Last updated: October 22, 2026
A caregiver handoff after surgery or discharge goes best when the home is ready before the patient walks in. This guide on how to prepare a home for a caregiver handoff after surgery or discharge focuses on clearing the path, setting up the room, confirming discharge instructions, and making the first 48 hours at home easier to manage.
What a caregiver handoff after surgery needs to accomplish
A good caregiver handoff turns discharge instructions into a working setup at home. That means the patient can move from the car to a chair, reach water and medicine, use the bathroom safely, and get to a follow-up appointment without improvising each step.
The handoff is not just “someone is available.” It is a transfer of practical information: what the surgeon or hospital said, what the walker is for, which movements are restricted, what home health instructions apply, and who to call if something does not match the discharge plan. If that information is vague, the home setup will be vague too.
This is also where many families overestimate what “ready” means. A tidy house is not the same as a safe one. A guest room may look fine, but it can still be wrong if the bed is too low for post-op knees or hips, the bathroom has no grab bars, or the patient must climb stairs to reach the only toilet. A caregiver handoff works best when the home is treated like a short-term recovery space, not a normal living room.
The basic test is this: if the patient arrives tired, sore, and possibly groggy from anesthesia, can the first 24 hours happen with minimal bending, reaching, lifting, and walking? If the answer is no, the home needs more preparation.
What should be ready before the patient arrives?

The essentials should be in place before pickup, not after the patient is already at the door. That includes a clear path, a resting area, bathroom support, and the written discharge instructions.
Use this order the day before discharge or the morning of arrival:
- Clear the entry and the main path. Move rugs, cords, loose stools, and low tables from the route from the door to the bed, chair, and bathroom. A 3-foot-wide path is easier to manage than a narrow lane, especially if a walker is coming in the door.
- Set up the recovery spot. Place the patient on one level of the house if possible, ideally near the bathroom. Put a pillow, water, tissues, charger, remote, and a small trash can within arm’s reach so the patient does not need repeated stands in the first hour home.
- Check the bed and chair height. A chair that is too low can be hard to get out of after surgery. Add a firm cushion if needed. If the patient must use a walker, make sure there is space to turn beside the bed and sit without twisting.
- Prepare the bathroom. Install or confirm grab bars if they are already there, and place non-slip mats where water might collect. A shower chair, raised toilet seat, or handheld shower can help depending on the procedure and the discharge plan.
- Review the discharge instructions line by line. Put the paper instructions, medication list, wound care directions, activity limits, and home health instructions in one folder. Keep the folder in the same room as the patient for the first day.
- Schedule the first follow-up appointment before the patient arrives home. If the hospital has not already set it, call while discharge details are still fresh. Put the date and time on a visible calendar, and note any transportation needs.
The point is not to turn the house into a hospital. It is to remove the few obstacles that create the biggest problems when the patient is tired and limited.
How do you prepare for a caregiving handoff?
You prepare for a caregiving handoff by confirming the discharge plan, assigning the first 24 hours, and reducing the number of decisions the patient must make. The most useful work happens before the car ride home.
Start with the discharge packet. Read the page that explains activity limits, wound care, bathing rules, warning signs, and follow-up timing. If the packet includes home health instructions, note whether a nurse, therapist, or aide is expected to visit, and whether the first visit has already been arranged.
Then confirm the handoff details with the hospital staff before leaving. Ask for the written discharge instructions in plain language if anything is unclear. The questions that matter most are practical: Can the patient use stairs? Is the walker required for every trip, or only outside the house? Is the patient allowed to shower, or only sponge bathe? What level of help is needed to stand from a chair or get out of bed?
Next, make the first day predictable. Put the essentials in one place: water, light snacks, a charged phone, the remote, tissues, lip balm, and any approved ice packs. If the patient is likely to be unsteady, keep one lamp on and the floor uncluttered. If the patient has post-op nausea or fatigue, keep the route to the bathroom open and the trash can close.
This is also the moment to confirm who is doing what. One caregiver may drive the patient home, another may stay for the evening, and another may handle the follow-up appointment later in the week. The handoff fails when everyone assumes someone else has the paper instructions or the appointment time.
One honest limitation: this setup is for a straightforward home recovery. It is not enough for a patient who needs 24-hour supervision, oxygen, complex wound care, or frequent transfers from bed to chair. In those cases, ask the discharge team or home health agency what level of help is actually required before the patient leaves the hospital.
Which room should be the recovery base?

The recovery base should be the room with the fewest barriers, usually the main-floor bedroom or a room nearest the bathroom. The wrong room can add stairs, turns, and unnecessary pain to every trip.
Choose a room that works with the patient’s current mobility, not with how the house is normally used. A second-floor bedroom may be fine for a healthy guest, but not for someone who must use a walker or avoid stairs after surgery. A room with a low bed can be harder to use than one with a higher mattress or a chair nearby for support.
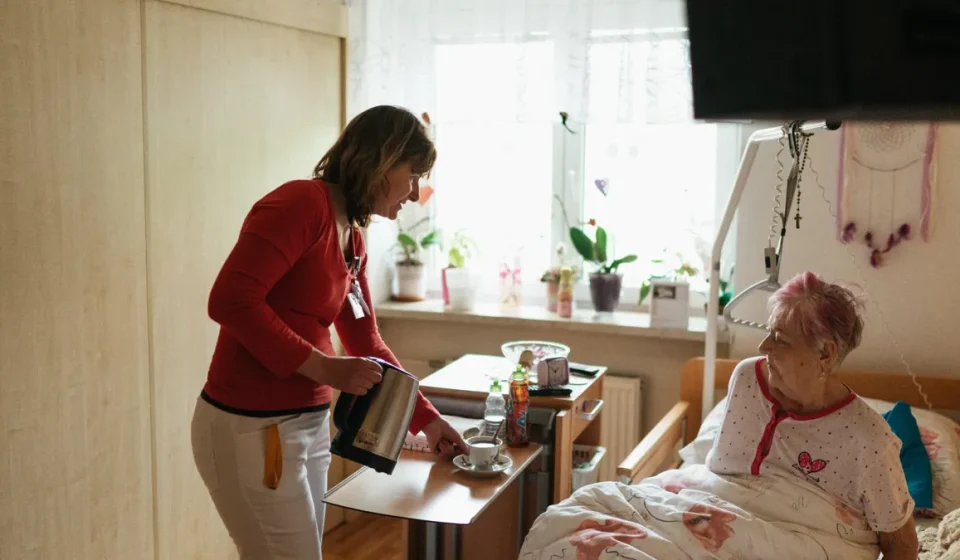
Make the room work like a small command center. Put a table beside the bed or chair with a lamp, clock, water, folder of discharge instructions, and medication list. If the patient needs to rest with the leg elevated, use pillows that keep the limb supported without forcing the back into a twist. Keep the call button equivalent simple: a phone within reach and a charger plugged in before the patient lies down.
Temperature matters more than people expect. A room that is too warm can make nausea and fatigue feel worse, while a room that is too cold can make it hard to rest. Aim for comfort and easy access, not perfection.
If the patient uses a walker, test the room by walking the route yourself with the device in mind. Can the walker fit beside the bed? Can the patient turn without bumping furniture? Is there enough space to stand safely before sitting? Small changes, like shifting a chair 2 feet or removing a decorative ottoman, can make the room usable.
What bathroom safety changes matter most?
Bathroom safety changes matter most because the bathroom is where slipping, twisting, and rushing happen. The highest-value fixes are grab bars, dry floors, and a seated option for bathing if the discharge plan allows it.
Start with the floor. Remove loose bath mats that slide. Dry the floor after every shower. Keep towels, soap, and toiletries within easy reach so the patient does not lean and stretch. If the patient is not steady, do not leave the bathroom setup to chance.
Grab bars are more useful than towel bars because they are meant for weight-bearing support. If the home already has grab bars, check that they are firmly mounted and placed where the patient actually reaches. If they are not present, a portable shower chair or raised toilet seat may be the next best option, depending on the surgery and the instructions from the care team.
The toilet is often overlooked. A low toilet can be a problem after hip, knee, or abdominal surgery because sitting down and standing up demand more strength and balance. A raised seat can reduce the strain. That matters more than many families expect during the first week home.
Because the toilet is often overlooked, the bathroom plan should account for abdominal surgery as well as hip or knee recovery. Bathing rules vary by procedure, so the discharge instructions matter here. Some patients can shower right away; others must keep the incision dry or wait for a specific period. If the instructions are unclear, ask before the patient gets home rather than guessing with a wet dressing.
This is one place where a generic “just be careful” approach fails. Bathroom safety is physical setup, not caution. If the tub edge is high, the floor is slick, and the patient is still weak from anesthesia, the risk remains even with a careful caregiver nearby.
How do you set up mobility support at home?
Mobility support at home means giving the patient the right tool, enough space to use it, and a route that does not demand extra strength. A walker is useful only if the home fits the walker.
First, confirm whether the walker should be used for every step or only part of the time. The discharge instructions should say this, and if they do not, the hospital should clarify it. A walker that is left folded in a corner is not helping anyone.
Second, make the walking route simple. Remove clutter from hallways, move cords off the floor, and keep pets out of the way during the first 24 to 72 hours if possible. Sharp turns, loose rugs, and low lighting are common sources of trouble. If the patient must go to the bathroom at night, place a light on the path and keep the route identical each time.
Third, practice the transfer points at home before the patient is tired. That means getting from bed to standing, standing to walker, walker to toilet, and chair to standing. The goal is not athletic performance; it is reducing hesitation. A patient who has already learned how to sit and rise without twisting is less likely to panic later.
Fourth, do not assume stairs are fine because the patient can manage one. Stairs are a separate task and often the hardest part of the first day home. If stairs are unavoidable, the discharge team should have already addressed them. If the patient avoids stairs entirely during recovery, that is often the safer choice.
Mobility setup is where trade-offs become clear. A downstairs recovery area may be inconvenient for the household, but it is often safer than forcing the patient upstairs to keep the routine unchanged.
What should be checked about meals, medicine, and the first 48 hours?
Meals, medicine, and the first 48 hours should be planned so the patient does not have to make decisions while sore or sleepy. The first two days are about consistency, not culinary effort.
Prepare simple food that matches the discharge instructions. Keep easy items on hand: soup, yogurt, toast, fruit, crackers, or whatever fits the patient’s diet and appetite. If nausea is possible after anesthesia, small portions are often easier than a full meal. Keep water visible and close. Dehydration and missed meals make recovery harder, even when the surgery itself went well.
Medicine belongs in the discharge packet, but the home setup should make it easier to follow the instructions. Put the paper list in one place and keep the timing visible on a calendar or phone reminder. If the instructions say to take medication with food, make sure food is ready when the dose is due. If a prescription needs to be picked up, do that before the patient arrives if possible.
The first 48 hours should also include a simple check-in routine. That might mean asking about pain, dizziness, bathroom trips, appetite, and whether the dressing looks the way the discharge instructions described. Keep it brief and concrete. The point is to notice a change early, not to interrogate the patient.
If home health instructions mention a nurse visit, therapy visit, or dressing change, write the day and time down immediately. A recovery plan that lives only in the hospital paperwork is easy to lose. A plan written on the fridge or in a shared calendar is harder to miss.
What mistakes make a handoff harder than it needs to be?
The most common mistakes are treating discharge like an ending, setting up the wrong room, and assuming the caregiver will “figure it out later.” Each mistake costs time, comfort, or safety.
The first mistake is ignoring the discharge instructions until after the patient is home. That can lead to the wrong bathing setup, the wrong mobility plan, or missed follow-up timing. The fix is to read the instructions before arrival and keep them visible.
The second mistake is preparing the home for a healthy visitor instead of a recovering patient. A decorative rug, a low sofa, or a narrow bathroom path may look harmless, but they become obstacles when the patient is weak. The fix is to remove or move anything that complicates standing, turning, or steady walking.
The third mistake is leaving the bathroom for last. People often spend time on food and blankets and then discover the toilet is too low or the shower is too hard to use. The fix is to make bathroom safety one of the first checks, not the final touch.
The fourth mistake is skipping the follow-up appointment. That appointment is part of the recovery plan, not an optional extra. The fix is to schedule it, write it down, and arrange transportation if needed.
A final mistake is assuming all surgeries need the same home setup. They do not. A patient after knee surgery may need a walker and a raised seat. A patient after a different procedure may need a quieter room and closer monitoring instead. The discharge plan should decide the setup, not habit.
For broader coordination beyond the home itself, the caregiver planning and coordination hub can sit beside this guide.
Key Takeaways
- A caregiver handoff works best when the home is treated like a short-term recovery space, not a normal house.
- The most useful prep happens before the patient arrives: clear paths, set up the recovery room, and confirm the discharge paperwork.
- Bathroom safety and mobility support matter more than decorating or deep cleaning.
- The discharge instructions, follow-up appointment, walker use, and home health instructions should all be gathered in one place.
- If the patient needs 24-hour supervision, complex wound care, or frequent transfers, consult the discharge team or home health agency before relying on a basic home setup.
Drafted with AI; not yet reviewed by a person.